Deploying Shortr: How I host Spring Boot, Redis, and Postgres for free on Railway
18 Mar, 2026
Finding reliable, free hosting for a Java application complete with a database and cache has always been a challenge. Today, I run Shortr in a real production environment without spending anything.
The production environment problem
When you develop on your machine, a simple docker compose up solves your life. Postgres runs on port 5432, Redis on 6379, and the application on 8080. But what happens when the project is done? To put this in a public portfolio where any recruiter or user can test it, the story changes.
The market offers options like AWS and Heroku, but you quickly realize that keeping three separate services running (a Spring Boot application, a relational database, and a cache server) consumes resources fast. The free tier vanishes, and your credit card takes the hit.
I wanted a demonstration environment for Shortr, my minimalist URL shortener built with Spring Boot 4 and Java 25. The goal was simple: a real, functional deployment, clean architecture, zero monthly cost, and a platform that didn't require a credit card upfront. That is how I landed on Railway.
Why Railway?
Many platforms charge per service or require a paid plan to add databases. Railway works with a visual provisioning model where you add infrastructure blocks to your project and pay (or consume your free bandwidth) based on RAM and CPU usage, not by the amount of services.
This means you can have 5 tiny services running and still stay within the free limit of 500 usage hours and $5 monthly platform credits. For a project focused purely on demonstration and study, it is the ideal scenario.
How the deployment actually works
My project already had a Dockerfile configured. The great thing about Railway is that it detects this file and uses it to figure out how to build and run the main application, without requiring specific configuration files (YML) for the platform. However, the infrastructure (database and cache) is not automatically provisioned for you: it must be created manually in the interface as separate building blocks. Everything is done visually.
1. Creating the infrastructure services
In the Railway dashboard, I clicked + New, and started designing the infrastructure using the visual Building Blocks:
- I added a PostgreSQL instance.
- I added a Redis instance.
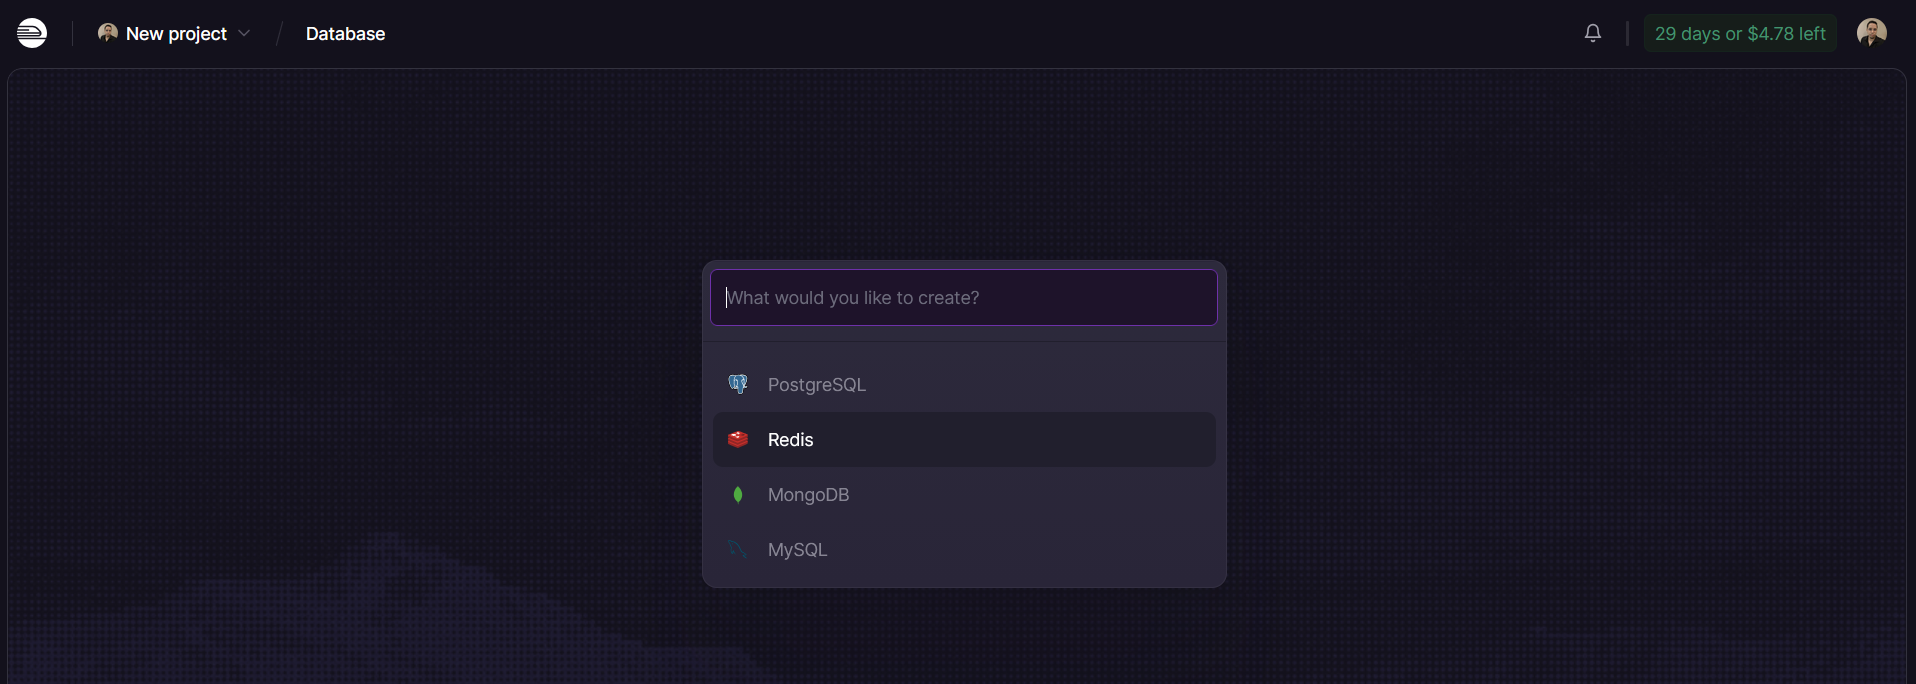
With this, the platform manages the instances and exposes default environment variables for both (like DATABASE_URL, REDIS_URL, etc).
2. Connecting the application
In the same UI, I added a new service by selecting the GitHub deployment option. At this step, I had to connect my GitHub account to Railway and grant the necessary access and editing permissions to the Shortr repository. Once connected, Railway looks for the Dockerfile in the project, starts the Maven build, and spins up the Java application container. After that, you will have three distinct blocks running on your project canvas.
3. The application-prod.properties file
This is the part where I lost a good few hours banging my head against the wall, but I am documenting it here precisely so you don't have to waste your time. In Spring Boot, my application-prod.properties expects specific keys to connect to the database and cache:
1# Prod Profile 2spring.datasource.url=${DB_URL} 3spring.datasource.username=${DB_USER} 4spring.datasource.password=${DB_PASSWORD} 5spring.jpa.hibernate.ddl-auto=none 6spring.jpa.properties.hibernate.dialect=org.hibernate.dialect.PostgreSQLDialect 7 8spring.data.redis.host=${REDIS_HOST} 9spring.data.redis.port=${REDIS_PORT} 10spring.data.redis.password=${REDIS_PASSWORD}
The trick is: Railway provides the database credentials with its own variable names (e.g., PGUSER). Because the Shortr repository already had a .env.example file, Railway automatically detected these variables and listed them in the Variables tab of the dashboard, making them easy to fill out. I just had to map the variables to the services I created.
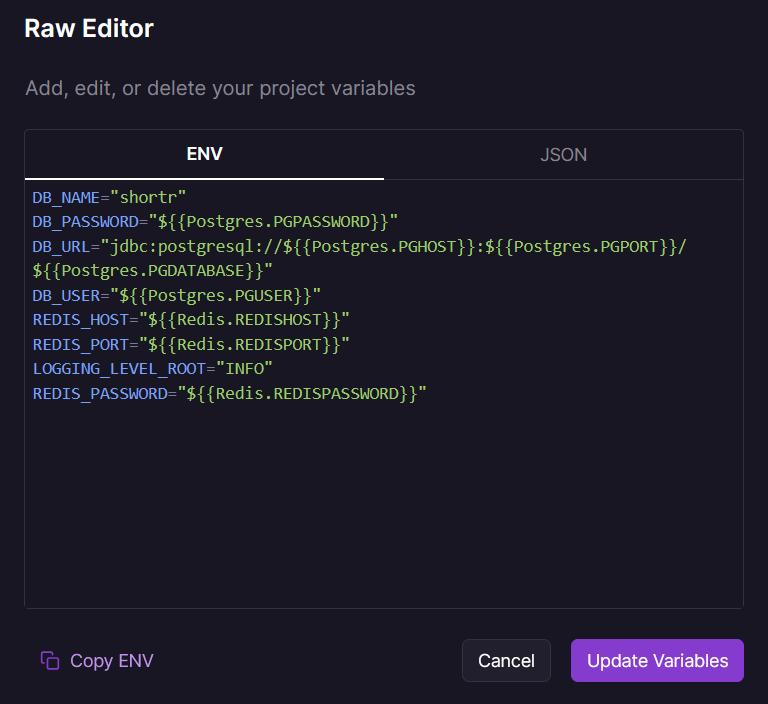
To configure the database:
DB_USERreceives a reference to${{Postgres.PGUSER}}DB_PASSWORDreceives a reference to${{Postgres.PGPASSWORD}}DB_URLreceives the JDBC connection string built with the infrastructure fields:jdbc:postgresql://${{Postgres.PGHOST}}:${{Postgres.PGPORT}}/${{Postgres.PGDATABASE}}
For Redis, I used the same sequence:
REDIS_HOSTmapped to${{Redis.REDISHOST}}REDIS_PORTreceives${{Redis.REDISPORT}}REDIS_PASSWORDreceives${{Redis.REDISPASSWORD}}
An important architectural detail here is Railway's Private Networking. When referencing variables like PGHOST and REDISHOST, the application isn't going out to the public internet to find the database. All services within the same Railway project communicate through an isolated private network (using IPv6), which means the database and cache are completely protected from unwanted external access, with no need to manually configure complex VPCs.
This keeps the application isolated from the platform's constraints. My code does not need to know it is running on Railway; it just consumes generic environment variables. When I need to set the Spring execution profile, I just create the variable SPRING_PROFILES_ACTIVE with the value prod.
The Trade-off
Remember: free infrastructure comes with rules. On Railway, the credits do not last a full month if your application serves real, heavy traffic. The limit of 500 hours of RAM and CPU per month is calibrated for testing and presentations. If the limit exhausts, the project pauses until the start of the next cycle. For a production website receiving load, this is unacceptable. For showcasing your projects and proving your architecture works, it is more than enough.
Start now: head over to the Shortr repository, study how the Dockerfile is structured, create your account on Railway and see the deployment happen for real.


Comments